BQ4847 Frankenstein
| Many
of us TI'ers and Geneve users that have some of the original run
IDE disk controllers from 2005 era with the BQ4847 clock chips
have experienced the batteries dying have had to go out find a
replacement. Besides my SHIFT838 RTC clock module (HERE) that allows you to change the
battery and crystal if it fails easily, this BQ4847 like many of
this type of RTC's do not allow that to be done as the IC is
completely sealed. This was typically done in order to
save on manufacturing costs and manufactures did not think these
would be in use past their 10 year battery life. But they
did not take in account our group of TI enthusiast! Well I'm here to tell you it can be done and without much effort. Below you will find the steps to be able to do this your self. Please note this method will work on many of these types of RTC modules. Please be sure to read the datasheet! First I had to consult the datasheet of course and from there I found out what pins need to be exposes as they are only connected internally to a coin cell battery that produces 130mAh of capacity. The battery itself is internally isolated from both the VOUT and CEOUT, therefore no need for a diode to protect the circuit. This makes it super easy, as all you need to accomplish this is:
This whole effort took me about 15 minutes. Starting with the dead BQ4847 and identifying the pinout: 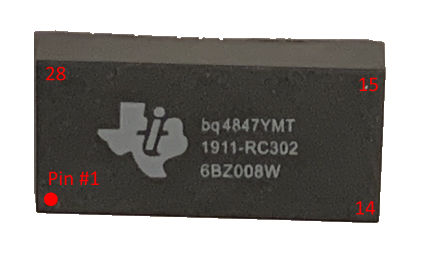 The pins we need to expose are pins 20 (negative) and 24 (positive). I used a small double-cut file and took my time until enough of the pins were exposed to be able to get some dabs of solder onto. 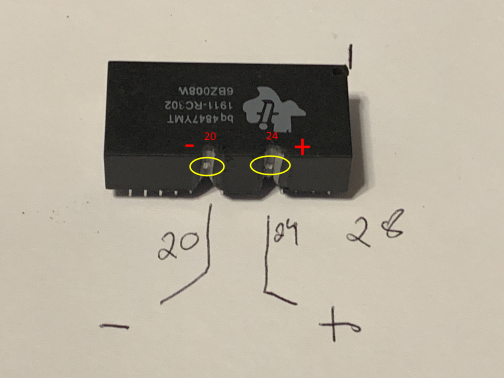 I then placed a dab of solder on each of the exposed pins: 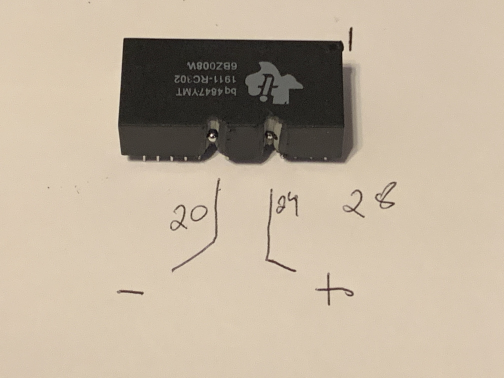 I then placed a CR2030 snap battery mount to the top of the BQ4847 making sure I lined up the negative pin the battery holder in the filed channel of the BQ4847 pin #20. (I used some hot glue to mount it). This was so I could just run some solder from the battery holder to the pint #20 and no wire. Now just run a wire from the positive side of the battery holder to pin #24 and solder in place. That's it! You now have a BQ4847 Frankensteined!  |